Saturday, December 28, 2013

Second Floor Updates


Below are a few of the updates that have taken place within the past year or so. 
I will finish uploading later..I'm ready to  finish the basement room! 
A big shout out to Aaron Hamilton who painted the office, hallway, and stairwell walls. 
(I was always too scared to try and paint above the stairwell...) He did an excellent job! 

Second Floor Master
MLS Photo of the Master Bedroom


Moving in! (June 2010)
Old light fixture, yellowish-white walls, brown trim and old carpet. 


Before 2


Before 3


Window in process of being painted. Also, notice the awful color on the wall to the left. 


Injuring myself is inevitable... Pushed my hand right through the window while trying to make it stop rattling (from the window unit). You could see it was in bad shape anyway. I believe this was about 2 weeks before slicing my foot on a stub of rebar (unrelated). Call me Grace.


After it was fixed. 


Here (and directly below) you can see the difference between the previous color (yellowish) with the new (Crushed Peanut). I was looking for a much cooler wall color--and this one stuck out to me. It is also carried into the upper hall, stairwell, and the second upper bedroom. 


  Much more calming, I think.


This was taken after the walls and trim were done, but before the new carpet. 
I was so happy to get rid of that annoying ink stain that has been there since I moved in. 


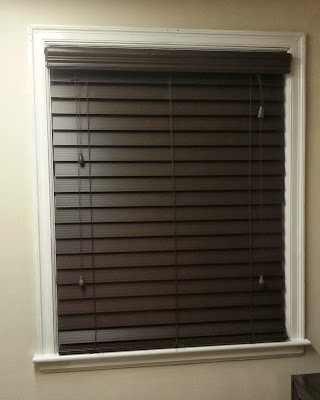
These are the windows with the new window treatments. Espresso to match the furniture.
I will update with pictures of the new curtains.


I found this adorable mirror at Goodwill for only $15!
Perfect condition--just needed to be assembled and cleaned up.


It was perfect for this empty corner near my closet. 


This was taken after the new carpet was installed. No stains, no wrinkling, no foreign history.
I have new bedding and curtains, but other than that, I am done with this room for a while.


Second Floor Office/Spare Room

When I moved in.


Again, I was greeted by primary colors, wood trim, and old carpet. 


This was after painted white, but still with the wooden trim and old carpet. 
Photo is fairly old, as it was my friends' room at the time (back when shared by two people).


Built in shelves used as additional closet storage (smart). 


Old carpet in bedroom (what is now the office).


After all of the carpet is removed.
Floor is in okay condition, but there are many burns/damaged areas that would have been expensive and time consuming to repair. I left the hardwood for a couple of months, to help me decide if I wanted carpet or refinished wood. I chose carpet.. soft, warm, and refinishing just sounded like a headache.


Photo of what the book corner looked like before. On the right are both shelving units. This is how it was originally installed, but it left an awkward gap between the shelf and the wall on the right.


Not large enough for storage or to reach back and paint (below).


The wall and trim after being painted--this felt so good.


Clearly, the shelving units had become dingy, so I spruced them up with a white gloss paint. 


Since I wanted to create an opening in the back corner, I decided to re-purpose one half of the unit as an entertainment center/additional book storage.


 During carpet installation. This included the entire second floor.


The new book corner! Much more cozy, I think. New carpet is pictured here as well. 


Finished product. It looks a bit different now that I have added a guest bed, but this gives you a good idea. 

.
Hall Way

After removal of old carpet. 


In process!


New carpet with trim and wall color. I like how they turned out together--I heart neutral. 


Hallway after carpet is installed. It feels/looks/is so much cleaner! 

Stairwell

This is how the stairs looked originally. They were creaky and slippery. 
On the right, the trim is original color, and on the left is where I began priming the trim. 


Trim is done, now just waiting for the carpet. 


 Here we goooo! 


All done! It is soo much quieter, softer, and safer. 


.Again


Much cleaner looking too, I think.


 Second Floor Bath

Original bathroom fixture--hawt. 


Instead of buying a new faucet, I purchased the brushed nickel metallic spray paint. 
I am happy with the results so far!


Towel rack on side is painted too. 


Additional towel racks in bathroom painted. 


Closer look. These were originally in a chrome color--yuck.


I can live with this! (Minus the rebellious curtain hook.)
Below is a reminder of what the bathroom looked like when I first moved in--enjoy!


This has definitely been a work in progress (and will continue to be). You can find in an older post that the floor used to match that lovely toilet seat cover. BA. But what has been done?
Shower installed
Replaced the mirror/light fixture above sink
Painted vanity
Tiled floor
Painted tile around bathroom (the green stuff)
Painted hardware/towel racks
Freshened up the top of the vanity
Spruced up the sink fixture


Much more to come, and I promise to post soon. Thanks for reading! 

Friday, August 30, 2013

Front Yard

It's been 8 months since my last post. Embarrassed.

Either way, I have been busy with home projects! I am currently working to get my upstairs finished, but I wanted to post a few other projects to catch up.

Front Yard--
The tree in my front yard sheds little needle leaves that are toxic to my grass (obviously). 
This photo was taken early this spring.


More of the sad, grass-less yard. 


Another photo of the yard/house earlier this spring. The most horrible landscaping plan, ever. 


Buuut, there's hope! After a day of working the ground over, and planting new seed, the grass was able to grow again. It loved growing so much, it grew into the driveway! (grrr...)


I started trimming the bushes in my front yard one day, and ended up going to the store, buying a chainsaw, and removing them. (Go big or go home, right?) My old neighbor rode his lawn mower over, chuckled, and said, "I saw you trimming them and the next thing I knew, they were gone!" Yep..as they should be. The picture directly below is just after they were removed.


Aaaaaand they're gone. 


I ended up bringing the bench from my backyard to place under the tree. 
I'm thinking of painting it though... just not sure what color. Thoughts?


This is the trunk of the tree that is up against the house--crazy, huh? 


The backyard, on the other hand, can vanish from existence for all I care. 
I am currently looking for someone with professional (and hecka-powerful) tools to get it under control. 
I plan to kill everything off so I can plant new seed next spring. We'll see!

Thanks for reading!

Thursday, December 27, 2012

Basement Betterment

I hope that everyone had a Merry Christmas, and enjoyed their break! During my time off, I have been trying to fix a few things in my basement. Here we go...


This is what the original storage/laundry room floor looked like when I purchased the house. 
Normal wear and tear (and spills) on concrete. Not too pleasant to look at.

Then, add the crap of about 6 girls living in the same house, and sharing the same storage (catch-all) room. YIKES.

Eventually, I painted the floors with concrete paint. OH MY WORD. That was tough. Took forever to dry (since it was in the basement) and I believe I spent the majority of time high on paint fumes. Nevertheless, it looks much better than what it did originally. 
This was a while ago. 


The paint helped smooth the overall eyesore, but with holes in the concrete (collecting dirt and dust), it just never felt clean on the "laundry" side. Thus, a new project began... 


After clearing out a pile of junk that was well... junk, it was already better.

This thing is the biggest pain in my side. So ugly, so permanent, and so dangerous! 
I literally hit my head three times while laying the new tile. You think I'd learn? 

Anyway, I found super cheap floor tiles at Home Depot, and began to lay them out. 
I ended up choosing the white because of it's bright, clean finish. 
Also, it is very easy to sweep, thus keeping the dirt from collecting in holes.

Getting there...

Almost done.. 

 ...and BOOM. It feels so much better in there. 
I'm still working on the piping (you can see it's white now), and the wall. 
I am painting those a fresh white color as well. 


  SNEAK PEEK
I have been planning to fix up the bar area. Not sure when this will happen, 
but I'm happy to report that I got rid of the chalk board bar top. 
It was fun while it lasted, but it needed an update.

Begun, the update has...

TO BE CONTINUED...

(Thanks for reading!)

Sunday, November 25, 2012

Christmastime

It's beginning to look a lot like Christmas! 

This is the first Christmas with the new paint. I'm happy to report that all of the colors seem to play nicely with one another. I've backed off a little with the decorating this year (mainly due to lack of energy), but I love that it remains simple. 


I've added a rug to the center of the room for a bit of added warmth. 
So much wood and tile flooring can be harsh to bare feet during the winter! 
Happy Holidays!

Thursday, May 24, 2012

Two years later...

Hey, y'all! I'm about 3 weeks away from my two-year anniversary of purchasing my home. I cannot believe how time has flown! I have recently begun painting my main level living and dining room, as well as the hallway. It's not complete, but I'm afraid it might be a while before I can post finished pictures.

Anyway, here are some updates of what's been happenin' around the house...

Living Room Gets a Facelift
With just under a hundred different wood types and tones, 
here is what the living room looked like when I initially purchased the house. 
However, the color on the wall was not this bright of a white, it was more of an "eggnog" color.


After I painted the fireplace (this was done a while ago).

Here is a picture of what it looked like recently, before I started painting. Sorry it's so dark.


Miss Bevin and I started painting the long wall first. 
I chose a shade of darker grey, "Smokey Day", for an accent wall. I love having the long 
wall a darker color, because it really brings the living and dining rooms together.


We then moved on to the lighter grey "Windsor", 
which is a few shades lighter than the accent wall. 
Lauren helped me MAJORLY with this project. We've both been painting our butts off! 

Two things: 
1. Once there was a strip of the grey in the hallway (below), I realized that the hallway was 
actually GREEN before..instead of the weird yellow color.
2. Isn't this trim color awful with the cool tones of the paint? I think so, too.


The hallway after being painted the grey. Yes, I realize that it looks pinkish purple--
that's what you get for using a camera on your phone. At least it looks much cleaner.

Then we started painting the trim... Lesson Learned: It is a NEVER-ENDING process! 
Here is a picture of my main front window before painted.

After the window is painted--Holy Freshness!

On to the rest of the trim we go... This is with the morning light coming in. I just love that big window now! I'm trying to decide what to do with the window treatments. I want to keep it as light and airy as possible, but without losing the privacy of dark curtains.... so we'll see what happens. Thoughts welcome!

Trim...

I plan to paint the hallway doors the dark grey color. I'm just sick of all the wood--blugh!

Trim...


...and more trim. Don't mind the thing hanging on the wall--
I just wanted to get it off of the floor-- it's definitely not going to stay there. 

Since I have moved into this house, the yellow glow of the sconces have driven me nuts-- 
to the point of not even turning them on...ever. On the right, you will see the original sconce, and on the left, you will see one that I made (like father, like daughter right?) Removing the yellow glass keeps it from looking dingy, and adding the box around makes a cool shadow! 
White light from the sconces makes it feel more updated, I think.

Here is a picture with both built, and everything put together! 


I thought I would share this, too. Lauren is working on her room now--
she likes to mix and match tools with kitchen utensils. :)

I'm still working on many, many touch-ups and finishing some trim work, so my work is definitely not done. Hopefully this summer will be another project-filled one-- Feels good to be blogging again!